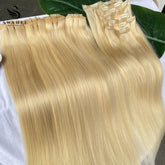
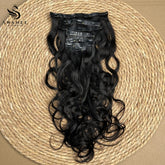
Two Ways to Keep Your Clip-In Hair Extensions From Slipping Out
Clip-in hair extensions are designed to be placed anywhere you want and secured directly into the hair like any hair accessory. To enhance their hold, you can use one of the two techniques below to keep them securely in place. Here are two effective methods to make your clip-in hair extensions more stable:
1. Create a Braided Base
If you seek long-lasting hold, attaching your clip-in hair extensions to a braided base is an excellent way to ensure a strong and secure grip. This method requires basic skills in creating French braids, plaits, or cornrows.
Step 1
Part your hair in the area where you plan to attach the extensions, and secure the loose hair above the part with a clip. Create a second part just below the first one, and use another clip to hold the hair below out of the way.
Step 2
Braid the remaining hair horizontally across your head, stopping about an inch away from your hairline.
-
For short hair: Continue braiding to the tip, then use a bobby pin to fasten the braid's end to the scalp near the base.
-
For long hair: Stop braiding near the scalp, secure the braid with a small rubber band, and let the ends hang freely.
Step 3
Attach your clip-in hair extensions directly to the braided base. Repeat this process for any additional sections where you want to add extensions.
2. Tease Your Hair
If you have fine, thin hair or hair damaged by chemical treatments (such as hair dye or relaxers), teasing the roots before attaching extensions can provide a stronger base.
Teasing—also called backcombing—involves combing hair toward the roots to create a dense, textured foundation. While often used to add volume to straight or thin hair, gentle teasing in small sections can create a solid base for secure extension placement.
Step 1
Use a comb to part your hair at the installation site. Secure the hair above the part with a clip.
Step 2
Create a second part just below the first one, and fasten the hair below with a clip or elastic to isolate the working section.
Step 3
Take the loose hair in the middle section. Hold a small-toothed comb about an inch from your scalp and use short, gentle strokes to backcomb the hair toward the roots. Avoid excessive force to prevent damage.
Step 4
Smooth the outer layer of the teased section with a comb or brush to maintain a neat appearance while keeping the textured base intact.
Step 5
Lightly spray the teased area with hairspray to lock in the grip, then insert the clip-in extensions firmly into the teased section.
Pro Tip: Work from the back of your head to the front, starting at the bottom and moving upward. Install extensions in the lowest, most secure sections first before moving to higher areas.
By using these techniques—whether creating a braided foundation for maximum stability or teasing for added grip—you can ensure your clip-in hair extensions stay securely in place throughout the day.


